

Making @Hashnode and @Twitter work well together | A 3-pronged #tip
Tips for optimising your blog post for both Hashnode and Twitter platforms


Refreshed Aug 2022
Preface
Hashnode primes a reader to shout out to the author of a post using the Share button at the bottom of the blog post. It's just below the emojis:
The buttons are on the bottom, somewhere here 👇
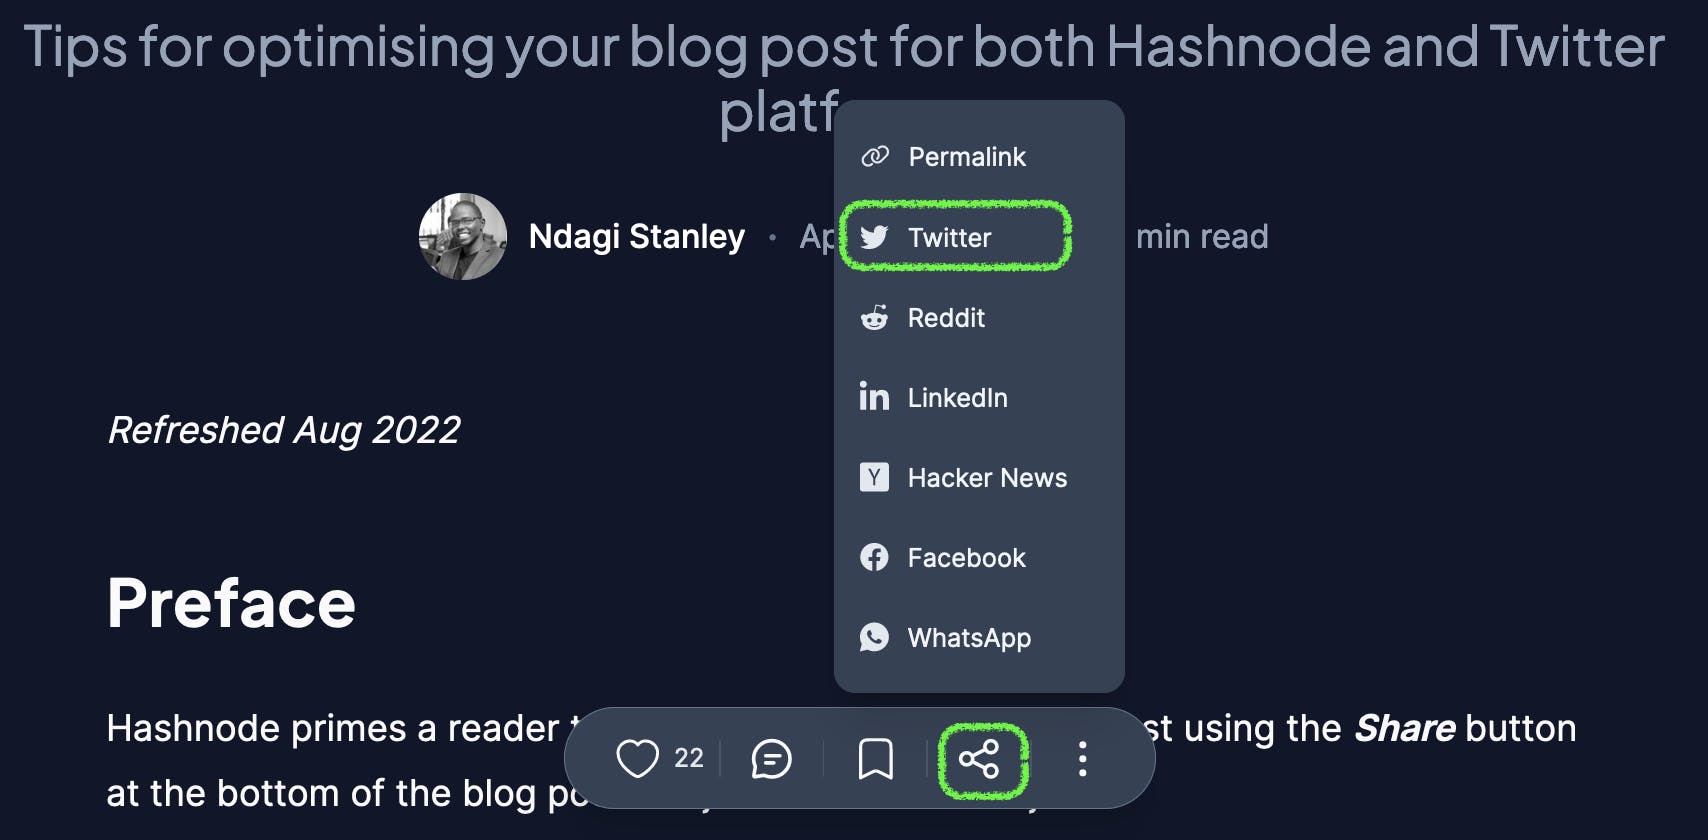
The highlighted Tweet button is used to share a post on Twitter (auto-filled with the title and author).
This post is about optimising your blog post for both Hashnode and Twitter platforms.
Thank you Maggie and Bolaji for allowing me to use your posts for demonstration.
How we got here
I'm part of a growing publication: DeveloperISH. Check us out!
Recently, a fellow publication member, Maggie posted a blog post in our publication. While sharing it on my Twitter network, I noticed some differences between my previous shares on Twitter and hers. By shares on Twitter, I mean what a tweet looks like by default without editing when you click on the Tweet button.

The post has since been updated, and with what we learnt, we collaborated to write this post. So allow me to show you how to make Hashnode and Twitter work well together.
The 3-prongs
Your profile
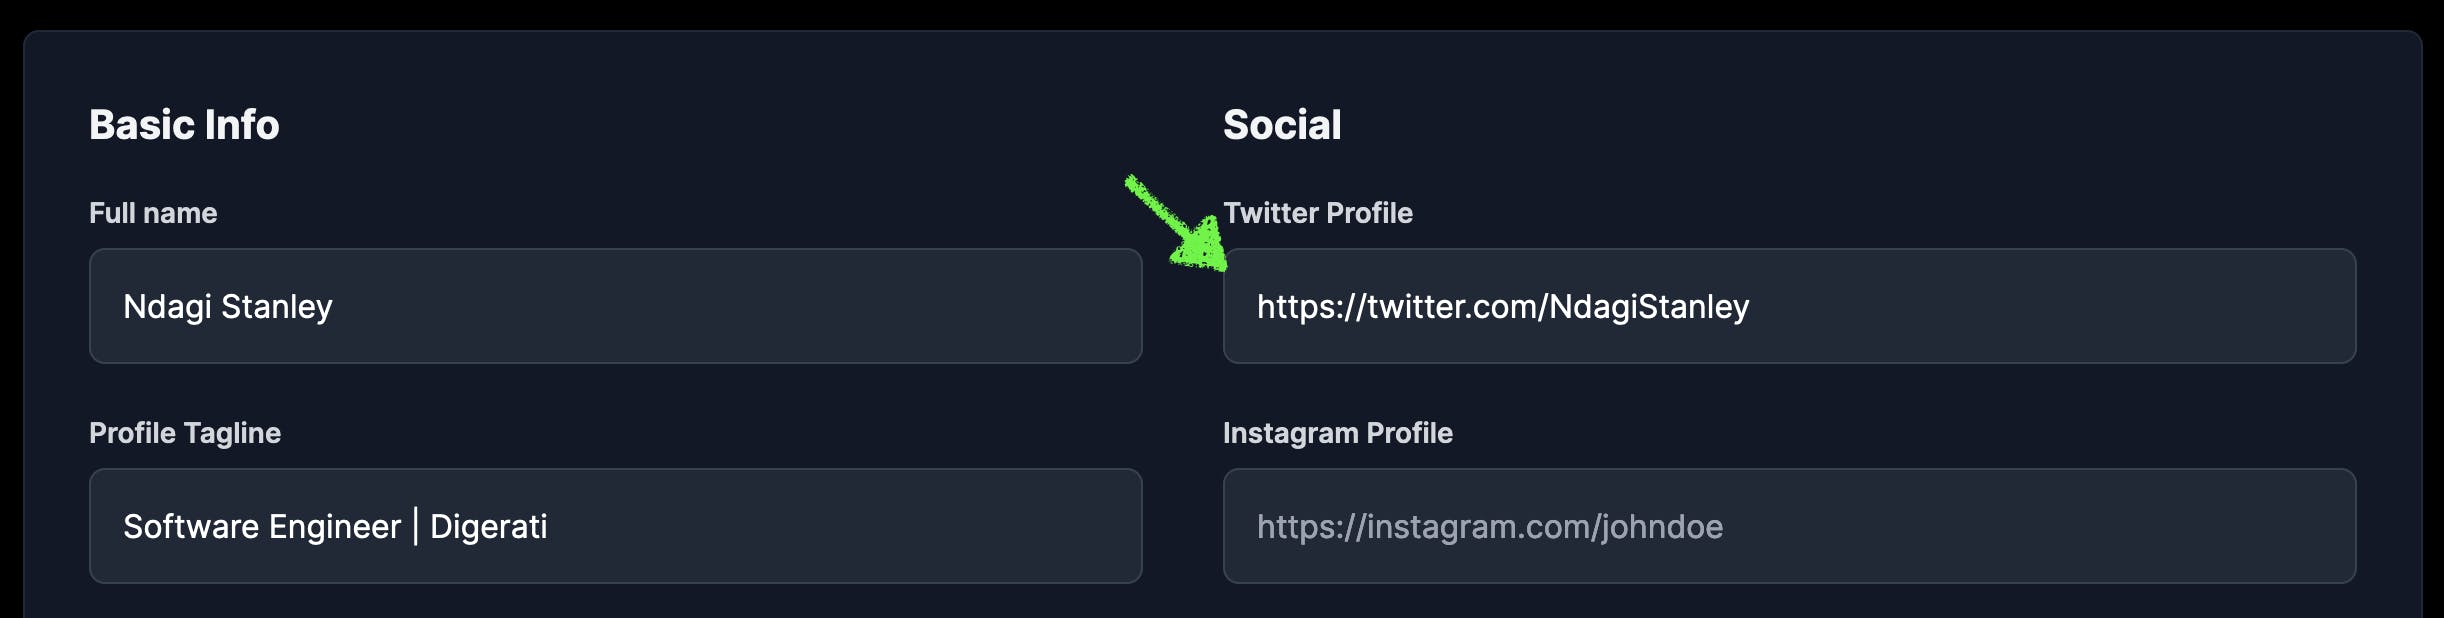
When you share from Hashnode, the Twitter account username you filled in your Hashnode profile is auto-filled in the tweet. If you don't have a Twitter account, only your name is filled out, like in the example above.
It looks like this when you update your profile with your Twitter handle.
If you haven't, go ahead and add your Twitter profile on your settings page:
Title
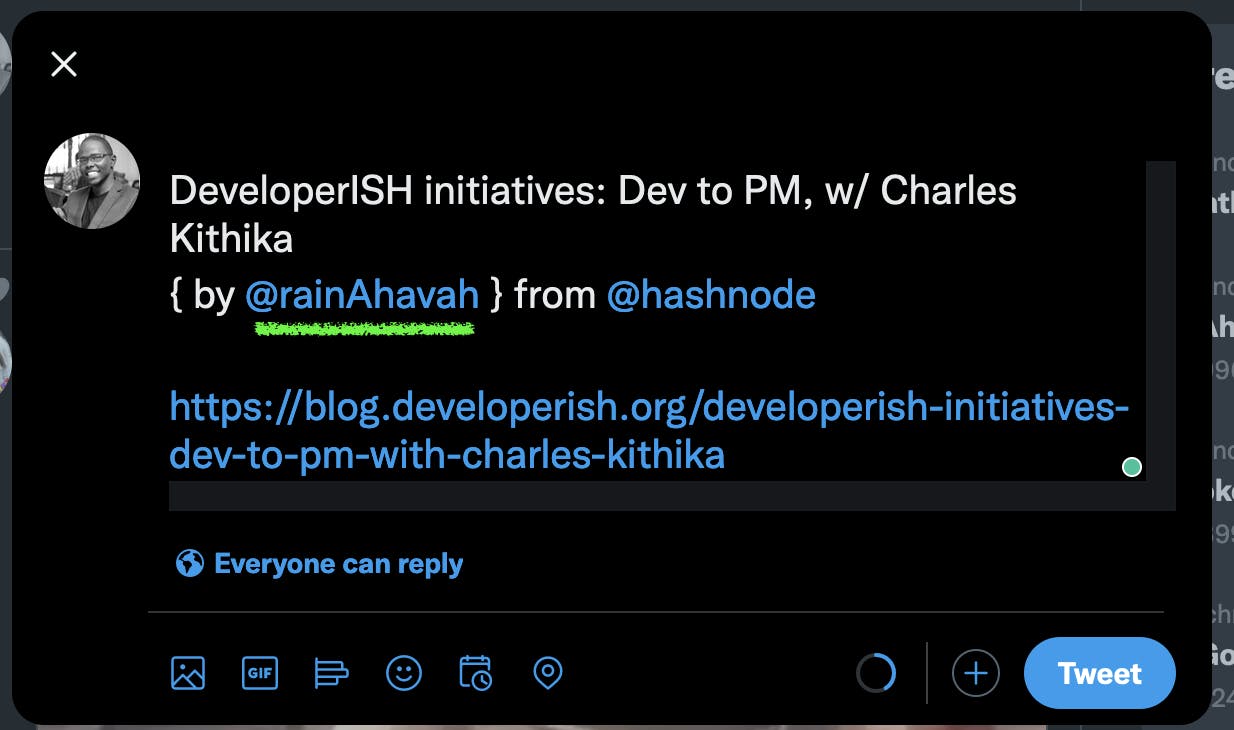
Ensure you add the username (with the @ symbol) of the subject person or subject matter. If not, this will go in the tweet as plain text. Here's an example from a blog post in Hashnode's Townhall written by Bolaji:

The title in Hashnode
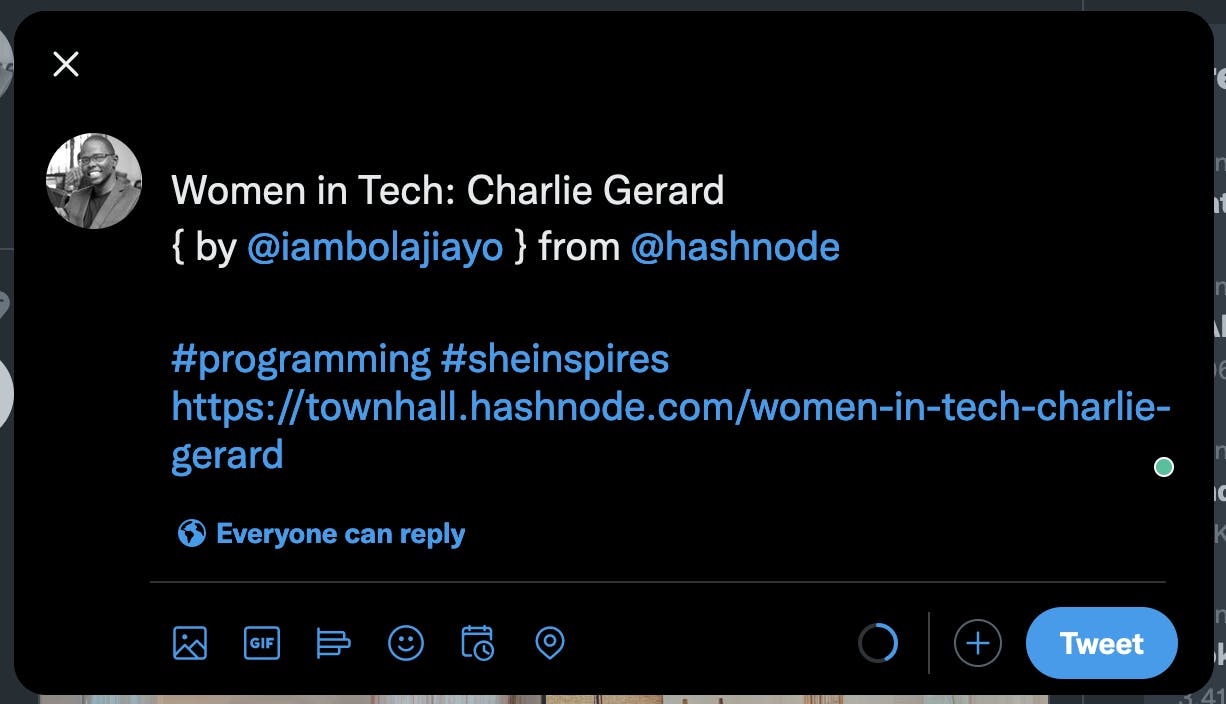
No @ username in the title, so Charlie, in this case, is not mentioned
Disclaimer: I understand that this may not apply to most posts. Where subject persons are concerned; maybe some individuals don't have Twitter accounts or don't want to be mentioned for some reason.
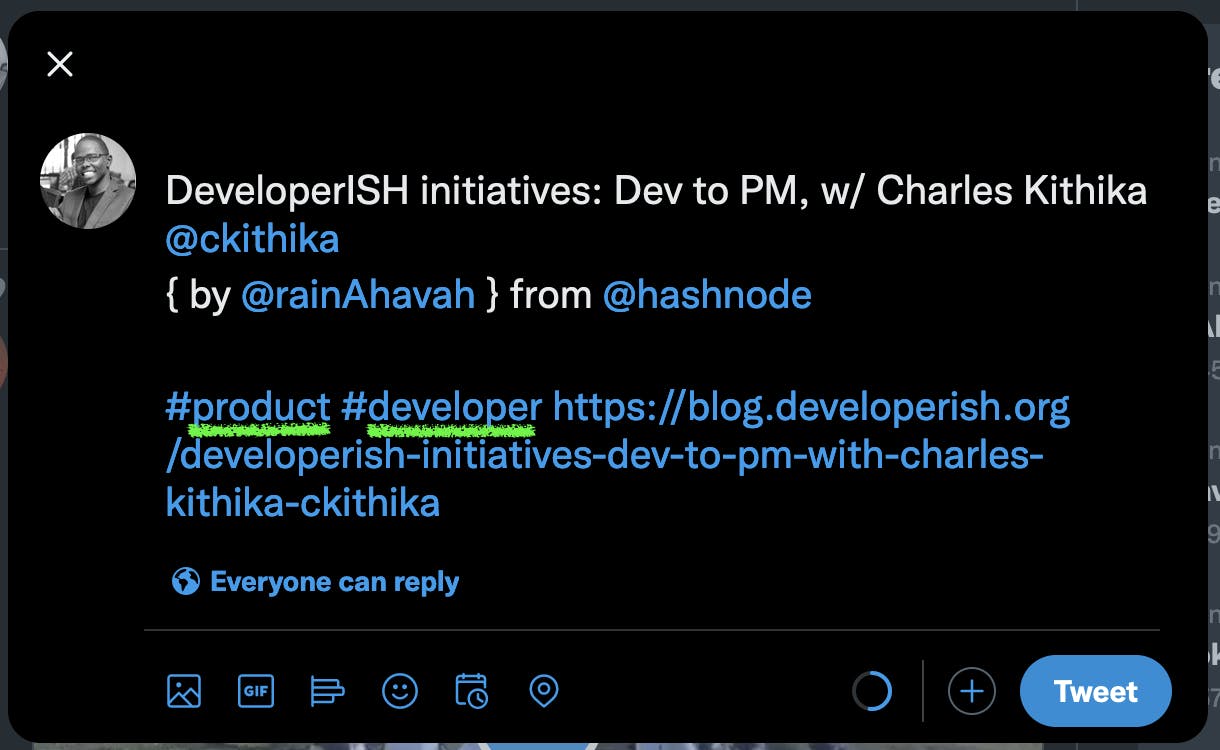
Back to our example post, this is what it looks like when you update it:

The blog post is optimised a notch better
Tags
The third prong in this tip is adding tags.
Tags make your posts more accessible to people who don't follow you by leveraging the tag's popularity. This is true for both platforms; Hashnode and Twitter.
The Hashnode editor has a tags section where you can add up to 5 tags. These tags will serve your post well on both platforms.
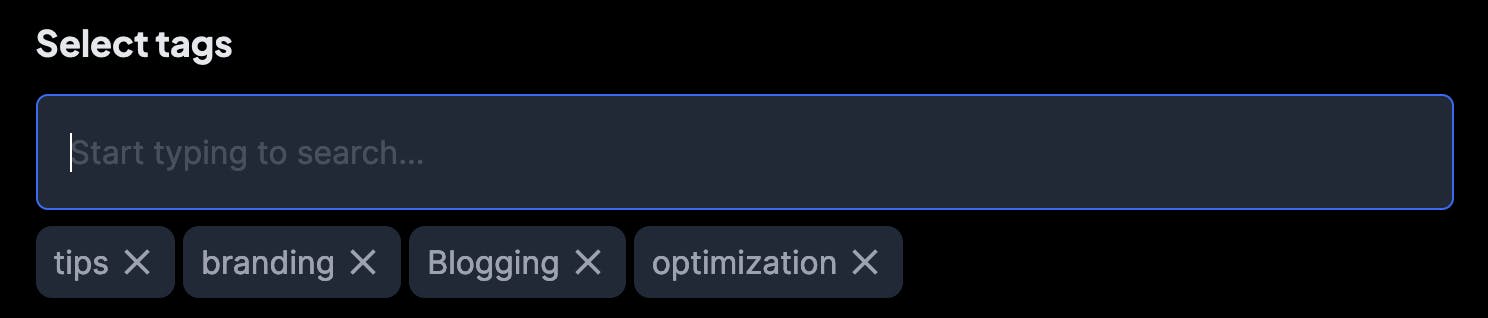
Tag section of the Hashnode editor
You might have noticed the word tip in this post's title is preceded by a # symbol. This is not highly advised since it will only make sense when shared on Twitter, as it will serve as a hashtag on the platform. All the same, you can add a tag as part of the title if you want to exceed the number of tags. Your call!
Finally:
Optimised blog post
Conclusion
So there you have it; an optimised Hashnode post that serves you well when shared on Twitter.

Moreover, following this tip adheres to the DRY (Don't Repeat Yourself) principle. Let's meet in the comments section below to share feedback and any tips you have up your sleeve.